While containerized roses can be planted almost any time, the best time to plant bare-root roses is in early spring or late fall. Avoid planting any rose at mid-summer during the hottest part of the day. Roses need room to grow and should not be planted too close together. Know the rose’s growth habit (shape and size) because the small containerized or bare root roses that are planted in early spring may growthree feet tall and three feet wide in a few months. Catalog descriptions usually include this information about each variety so read them carefully when selecting roses. Leave two to two and a half feet between hybrid tea and grandifloras and one to two feet between miniature roses. Give large roses like some old gardens roses and shrubs, more room to spread. Think ahead when planting climbers which may need the support of trellises, arbors or fences.
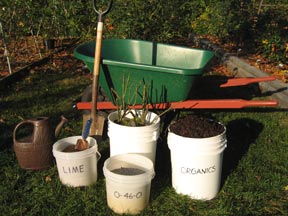
Planting Kit
Planting a Bare-Root Rose
- When the bare-root roses arrive, unwrap them and place the roots in a bucket of water. Hydrate roses for 4-24 hours.
- Dig an oversized hole to accommodate the roots. A hole 2 feet wide by 18 inches deep is usually big enough for a hybrid tea. The size of the hole really depends on the size of the plant.
 If in doubt, dig deeper and wider. If in doubt, dig deeper and wider.
- Take half the soil removed from the hole and mix with an equal amount of organic material. (Compost, aged manure, seaweed, etc.) Mix prior to backfilling.
- Add a cup of lime and a cup of superphosphate (0-22-0) or bonemeal, half into the planting hole and the rest mixed into the amended soil.
- Prune away any broken roots and trim extra long roots just enough to fit into the hole.
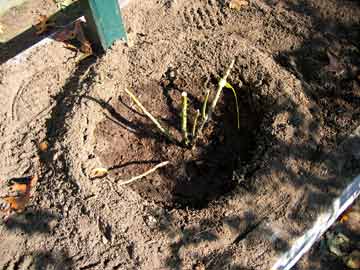
- Place the rose in the hole, spreading out its roots. Make sure the bud union will be two inches below the finished soil level.
- Partially fill in the hole with amended soil and add water. Let drain.
- Add more soil, water in again and drain. Do NOT tamp down with foot or shovel. By “mudding in” the rose, air pockets are eliminated and the plant is left in a moist environment in which to re-establish itself.
- Finish backfilling the hole with the amended soil and water again.
- If planting in the early spring, hill up the canes 12 inches or so with soil or mulch to prevent moisture loss on windy days. As the weather warms and the rose shows signs of new growth, push the mound away and water frequently. Build a well with soil a few inches high around the base of the rose as a reservoir to hold water.
- Attach a plastic label with the name of the rose around a sturdy cane. The metal labels that come attached to
- the rose can fall off and get lost.
Planting a Container Rose
- Dig a hole wider and deeper than the container.
- Make certain the container rose has been watered and the water has drained from the container. This hydrates the rose and makes it easier for the root ball to remain intact.
- Remove the rose from the container. If the plant cannot easily be lifted out, first cut out the bottom of the container. Then make a vertical cut down the side of the container and place the container in the hole. Remove the rest of the container from around the rose and out of the hole.
- Follow steps 3-11 above.
Transplanting Roses
- Roses are best transplanted when dormant - in Rhode Island that means from mid-November through mid-March.
- Prune the bush back by half, tie the canes together if necessary, and water well the day before you plan to transplant.
- Pre-dig the new hole and amend before digging up the bush to be transplanted. (See Planting a Bare-Root Rose.)
- Loosen the soil 12 inches out from the crown with a shovel, creating a root ball. A larger plant may require a larger root ball. Dig all around the bush, loosening the soil with the shovel. Carefully insert the shovel under the root ball and remove it with as large a root ball as possible.
- Follow steps for planting a bare-root rose as directed above. Be sure to water in well.
- Keep the rose well-watered for two weeks or longer.
|